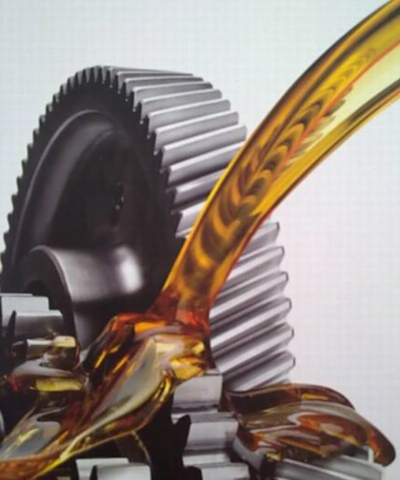
Changing the oil of a gear reducer requires adhering to the principles of safe operation, thorough oil replacement, and standardized record-keeping. The following is a universal and detailed step-by-step guide, including key precautions, applicable to most industrial-grade gear reducers.
I. Preparation Before Oil Change
1. Safety and Environmental Preparation
- Power Off and Shutdown: Cut off the power supply of the gear reducer, turn off related linked equipment (such as motors and conveyor belts), and hang a sign saying “Under Maintenance, No Switching On” at the power switch to prevent accidental startup.
- Cooling Temperature Control: Allow the gear reducer to cool naturally to 40-50℃ (the outer casing feels warm but not scalding when touched). If it cools down completely (to room temperature), the oil viscosity will increase significantly, making oil drainage difficult; if the temperature is too high (>60℃), the oil is prone to splashing, posing a risk of scalding.
- Site Protection: Lay anti-slip mats or plastic sheets under the gear reducer, and place an oil drip tray with sufficient capacity (it is recommended that the capacity be more than 1.2 times the total oil volume of the reducer) directly below the oil drain plug to prevent waste oil from polluting the ground.
2. Tool and Material Preparation
| Category | Specific Items |
|---|---|
| Tools | Wrenches (matching the specifications of the oil drain plug, oil level plug, and breather; socket wrenches are preferred to prevent slipping), oil suction pump (to help pump out residual oil), cleaning cloths (lint-free type to avoid fiber residue), funnel (for oil filling) |
| Materials | New lubricating oil (must be consistent with the type marked on the reducer nameplate; common types of gear oil include ISO VG 220/320; mixing oils of different brands or types is prohibited), sealed waste oil recycling barrel (for environmentally friendly disposal of waste oil) |
| Reference Materials | Reducer product manual (to confirm oil volume, plug positions, and special structural requirements), equipment operation records (to check the last oil change time) |
II. Core Oil Change Steps
1. Drain Used Oil (Key: Ensure Complete Drainage of Residual Oil)
- Unscrew the reducer’s breather (on the top, used to balance internal air pressure for easier oil drainage) and oil level plug (on the side, a plug for checking oil level; opening it can assist in air and oil drainage) in sequence.
- Finally, unscrew the oil drain plug (at the bottom, the main channel for oil discharge) and let all the used oil drain into the oil drip tray. If the oil drains slowly, gently shake the reducer (ensure the equipment is fixed stably) or insert an oil suction pump through the oil level hole to pump out the residual oil.
- Wait for the used oil to drain completely (usually 5-15 minutes, depending on the oil volume and viscosity).
2. Clean and Reset the Oil Drain Plug
- After removing the oil drain plug, check if the sealing washer (such as an O-ring or copper gasket) on its surface is aged or deformed. If damaged, replace it immediately (to avoid subsequent oil leakage).
- Wipe off oil stains and iron filings around the oil drain plug and the screw hole with a cleaning cloth (a small amount of iron filings may be generated due to internal wear of the reducer; they need to be cleaned to prevent secondary pollution). Then tighten and reset the plug (refer to the manual for torque; usually, “tighten by hand and then turn an additional 1/4-1/2 turn” to avoid damaging the threads due to over-tightening).
3. Fill with New Oil (Key: Accurate Oil Volume, Avoid Contamination)
- Choose an oil filling method:
- Conventional method: Align the funnel with the oil level plug hole (on the side) or the oil filling port (some models have a dedicated oil filling port) of the reducer, and slowly inject new oil.
- Convenient method: If the reducer has no dedicated oil filling port, remove the breather on the top and inject oil through the breather hole (ensure the funnel and oil filling port are clean to prevent impurities from mixing in).
- Control the oil filling volume: Refer to the reducer nameplate (usually marked with “Oil Volume: XX L”) or product manual. Stop injecting oil immediately when the oil level reaches the point where oil starts to leak from the oil level plug hole (or the oil level gauge shows a position slightly above the middle of the “MAX-MIN” range).
4. Check Oil Level and Sealing
- Let it stand for 5-10 minutes (to allow the oil to fully flow into the internal cavity), then unscrew the oil level plug again to check the oil level: The oil should just submerge the lower edge of the plug hole (i.e., “the oil level is flush with the plug hole”). If it is too low, add more oil; if it is too high, drain a small amount (fine-tune through the oil drain plug).
- Tighten the oil level plug and breather to ensure good sealing (also pay attention to the torque to avoid damage).
III. Follow-up Work After Oil Change
- Site Cleaning: Wipe off oil stains on the outer casing of the reducer with a cleaning cloth, and pour the waste oil in the oil drip tray into a sealed recycling barrel (waste oil must be handled by qualified units; random dumping is prohibited).
- Equipment Inspection: Manually rotate the input shaft of the reducer (if it is equipped with a motor, disconnect the coupling first) and feel whether the rotation is smooth without jamming or abnormal noise (if there is an abnormality, it may be due to improper oil level or internal failure, and the machine must be shut down for inspection).
- Record Archiving: Record the following details in the equipment maintenance record form:
- Oil change date and operator;
- Brand, type, and filling volume of the new oil;
- Discharge status of the used oil (e.g., whether there are abnormal colors or impurities, which can help judge the internal wear status of the reducer).
- Anti-rust Treatment: If the outer casing of the reducer has peeling paint or rust, touch up with the same type of anti-rust paint or protective coating to extend the service life of the equipment.
IV. Key Precautions
- Oil Matching: Strictly select oil according to the nameplate (e.g., “synthetic gear oil” Und “mineral gear oil” cannot be mixed, and different viscosity grades cannot be substituted). Otherwise, it will lead to lubrication failure and aggravate the wear of gears and bearings.
- No Disassembly Without Authorization: Non-professionals are not allowed to open the reducer end cover, so as not to damage the internal seal or installation accuracy.
- Adjustments for Special Models:
- Vertical reducer: Ensure the oil cavity is completely emptied when draining oil. After filling oil, rotate the shaft several times to help the oil fill the vertical cavity, then recheck the oil level.
- Reducer with oil level indicator (sight glass): The oil level should be based on “the oil in the sight glass accounts for 1/2-2/3 of the height”; there is no need to rely on the oil level plug.
- Oil Change Interval:
- New reducer: The first oil change is usually after 200-500 hours of operation (after the running-in period);
- Normal operation: Generally, change the oil every 6000-8000 hours (or 1 year, whichever comes first);
- Harsh environments (such as high temperature, dust, and high load): The oil change interval needs to be shortened to 3000-4000 hours.
Following the above steps can ensure the safe and thorough oil change operation of the gear reducer, effectively extend the service life of the equipment, and reduce transmission failures.